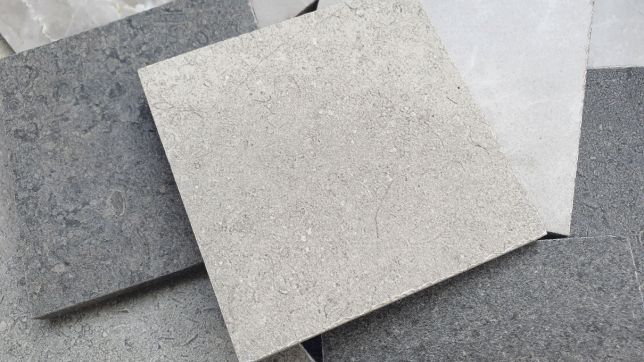
A chipped tile can make an otherwise clean and attractive room look neglected. Whether the damage happened because something heavy was dropped, furniture was moved across the floor, or everyday wear slowly weakened the surface, a small chip does not always mean the entire tile needs to be replaced.
Learning how to fix chipped tile is a practical DIY skill that can save money, reduce waste, and restore the appearance of your floor or wall. For minor damage, a tile repair kit, colored epoxy filler, or suitable touch-up compound can often produce surprisingly good results.
The key is to prepare the damaged area properly, choose a compatible repair material, match the color carefully, and allow the repair to cure before using the surface.
Can a Chipped Tile Be Repaired?
Yes, many small chips can be repaired without removing the tile. The best candidates are shallow chips, small edge breaks, and isolated areas where the tile underneath remains structurally sound.
Ceramic and porcelain tiles are particularly suitable for this type of repair. A colored epoxy filler can fill the missing section and create a smooth surface that blends with the surrounding tile.
However, repair is not always the best option. If the tile has a long crack, is loose, has significant structural damage, or has multiple large sections missing, replacing the tile may provide a more durable solution.
Before starting, examine the damage carefully. A cosmetic chip is much easier to repair than damage that extends deep into the tile or compromises its strength.
Tools and Materials You May Need
Before beginning your repair, gather everything you need. Having the materials ready prevents interruptions while the filler is being mixed or applied.
Common supplies include:
- Tile repair kit or colored epoxy filler
- Fine-grit sandpaper
- Painter’s tape
- Small mixing surface
- Toothpick, needle, or pin
- Clean cloth
- Mild soapy water
- Small applicator or plastic tool
- Hair dryer, if appropriate for the repair product
- Matching touch-up paint, if required
Always check the instructions supplied with your specific repair product. Different epoxies and tile repair compounds can have different mixing ratios, curing times, and application requirements.
Step 1: Clean the Chipped Area
The first step in how to fix chipped tile is thorough cleaning.
Small particles of dirt, dust, grease, and loose tile material can prevent the repair compound from bonding properly. Use a needle, pin, or similar fine tool to gently remove debris from inside the chip.
Be careful not to enlarge the damaged area. The goal is simply to remove anything loose or contaminated.
Once the debris has been removed, wash the area with mild soapy water. Wipe it clean and allow the tile to dry completely.
This drying stage is important. Moisture trapped inside the damaged area can interfere with some repair materials and make the finished patch less reliable.
Step 2: Protect the Surrounding Tile
Once the area is clean and dry, apply painter’s tape around the chip.
Place the tape close enough to protect the surrounding surface while leaving the damaged section exposed. This creates a small working zone and makes cleanup much easier.
Painter’s tape is especially useful when repairing floor tiles because epoxy can be difficult to remove once it has cured.
Take your time applying the tape. A neat boundary can make the final repair look considerably more professional.
Step 3: Match the Tile Color
Color matching is one of the most important parts of repairing a visible chip.
Many tile repair kits contain several colors that can be blended to approximate the shade of the original tile. Before adding the hardener, mix small amounts of the colors on a disposable surface.
Compare the mixture with the tile from different angles and under the lighting normally used in the room.
Do not rush this step. A repair that is structurally excellent can still stand out if its color is noticeably different.
For patterned or marble-effect tiles, an exact match can be more difficult. In those situations, you may need to reproduce the dominant background shade first and then add subtle markings after the main filler has cured.
Step 4: Mix the Repair Compound
After you are satisfied with the color, follow the manufacturer’s instructions for adding the hardener or activator.
Mix the components thoroughly and evenly. Avoid preparing a large amount unless the product instructions specifically recommend it, because some epoxy compounds begin curing relatively quickly.
Work carefully and keep the mixture within the taped area.
The consistency should generally be suitable for pressing into the chip without immediately running across the tile. Always follow the instructions for your particular product rather than relying on a generic mixing ratio.
Step 5: Apply the Filler
Now comes the main repair.
Using a small applicator, carefully press the colored filler into the chipped section. Make sure the compound reaches the bottom and sides of the damaged area.
It is usually better to slightly overfill the chip rather than leave it recessed. Once the material has cured, the excess can be carefully smoothed.
Try to keep the filler within the boundaries of the chip. The painter’s tape should help prevent unnecessary material from spreading onto the surrounding tile.
Avoid repeatedly disturbing the compound once it begins setting. Excessive manipulation can create an uneven surface or introduce small air bubbles.
Step 6: Remove the Painter’s Tape
If the product instructions allow it, carefully remove the painter’s tape while the filler is still workable.
Pull the tape away slowly rather than lifting it aggressively. This helps preserve the edge of the repair.
Some products may require the tape to remain in place during curing, so always follow the instructions supplied with the repair kit.
After removing the tape, inspect the edges. If you notice a small amount of excess material outside the chip, deal with it according to the product’s recommended cleanup procedure.
Step 7: Allow the Repair to Cure
Patience is essential when learning how to fix chipped tile.
Although a repair may appear dry on the surface relatively quickly, it may not have reached full strength. Follow the manufacturer’s recommended curing period before exposing the tile to heavy traffic, water, cleaning products, or pressure.
Some repair products may allow gentle heat from a hair dryer to accelerate curing, but this should only be done if the manufacturer’s instructions specifically permit it.
Using too much heat can potentially affect the surrounding surface or interfere with the curing process.
When in doubt, allow the repair to cure naturally.
Step 8: Sand the Repaired Area Smooth
Once the filler has completely cured, inspect the surface.
If the repaired section is slightly raised, use fine-grit sandpaper to gently smooth it. Work slowly and use light pressure.
The objective is not to aggressively remove material. Instead, gradually blend the patch so it sits flush with the surrounding tile.
After sanding, wipe away the dust with a clean, slightly damp cloth if compatible with the repair product.
Be especially careful with glossy tiles. Excessive sanding can dull the surrounding finish.
When Should You Replace Instead of Repairing a Tile?
Although repairing a small chip is convenient, some damage calls for replacement.
Consider replacing the tile if:
- A crack extends across a large portion of the tile.
- The tile is loose or moving.
- A substantial piece is missing.
- Water may be reaching an underlying area.
- The damage keeps getting larger.
- The tile has significant structural weakness.
A repair compound is primarily designed to restore a damaged surface. It cannot necessarily restore the original structural strength of a severely damaged tile.
Tips for a Better-Looking Tile Repair
A few simple techniques can make the finished result much less noticeable.
Work in good lighting. Natural daylight can make color matching easier.
Use small amounts of color. It is easier to darken a mixture gradually than to correct one that has become too dark.
Keep the surrounding area clean. Epoxy residue can be difficult to remove after curing.
Do not rush curing. A repair that is touched or cleaned too soon may become damaged again.
Test first. If possible, practice mixing colors on a disposable surface before applying the material to the tile.
Take photographs before starting. This can help you compare the repaired area with the original condition.
Preventing Future Tile Chips
Knowing how to fix chipped tile is useful, but preventing damage is even better.
Use furniture pads underneath heavy chairs, tables, and other movable objects. Avoid dropping hard or heavy items onto tiled surfaces, particularly ceramic tiles installed in kitchens and bathrooms.
When moving furniture, lift it rather than dragging it across the floor whenever possible.
Regular cleaning can also help identify small chips before they become larger problems. If you notice a minor defect, repairing it early may prevent additional material from breaking away.
Final Thoughts
A small tile chip does not necessarily require an expensive renovation. With careful preparation and the right repair compound, many minor imperfections can be restored at home.
The process is straightforward: clean the area, protect the surrounding tile, match the color, mix the filler, apply it carefully, allow it to cure, and sand the surface smooth.
The most important part of how to fix chipped tile is patience. Rushing the color-matching, application, or curing stages can make an otherwise simple repair look obvious.
For small cosmetic chips, a quality tile repair kit can provide an economical alternative to replacing an otherwise perfectly good tile. When the damage is extensive or structural, however, replacement remains the safer and more durable solution.
FAQs
1. How to Fix Chipped Tile Without Replacing It?
You can fix a small chipped tile without replacing it by cleaning the damaged area, applying matching colored epoxy filler, allowing it to cure, and sanding it smooth.
2. How to Fix Chipped Tile on a Floor?
To fix a chipped floor tile, clean and dry the chip, protect the surrounding area with painter’s tape, apply a suitable tile repair compound, and let it fully cure before walking on it.
3. What Is the Best Way to Fix Chipped Tile?
The best way to fix chipped tile depends on the size and depth of the damage. For minor chips, a tile repair kit or colored epoxy filler is often an effective option.
4. Can You Fix a Chipped Ceramic Tile?
Yes, small chips in ceramic tiles can usually be repaired with a suitable epoxy or ceramic tile repair kit. Proper color matching helps make the repair less noticeable.
5. Can You Fix a Chipped Porcelain Tile?
Yes. Small porcelain tile chips can often be filled with a porcelain-compatible repair epoxy. Large cracks or severe damage may require replacing the tile.
6. How Long Does It Take to Fix Chipped Tile?
A minor tile chip can often be repaired in one session, but the repair compound may need several hours or longer to fully cure. Always follow the manufacturer’s curing instructions.
7. Can You Sand a Chipped Tile Repair?
Yes. After the repair compound has completely cured, use fine-grit sandpaper gently to smooth the patch and make it flush with the surrounding tile.
8. Is It Better to Fix Chipped Tile or Replace It?
Small cosmetic chips are usually worth repairing, while large cracks, loose tiles, or extensive structural damage are generally better handled by replacing the tile.
How to Fix Chipped Tile
How to Fix Chipped Tile
How to Fix Chipped Tile
How to Fix Chipped Tile
How to Fix Chipped Tile
How to Fix Chipped Tile
How to Fix Chipped Tile
How to Fix Chipped Tile
How to Fix Chipped Tile
How to Fix Chipped Tile
How to Fix Chipped Tile
How to Fix Chipped Tile
How to Fix Chipped Tile
How to Fix Chipped Tile